Essential Guide to Changing Your WordPress Site Title
In the realm of WordPress, the site title serves as a fundamental element of your online presence. It’s often one of the first things you’ll need to set up as a website owner, yet it can easily be overlooked amidst the many other tasks that come with building a site. Whether you’re rebranding, adjusting your business focus, or simply realizing you’ve been using placeholder text, knowing how to update your WordPress site title is essential.
Understanding the WordPress Site Title
The site title essentially acts as the identity of your website. Much like a person’s name on an ID, the site title is what visitors remember, even if they forget specific content or products. This title appears at the top of each page and is a crucial aspect of your site’s visibility in search results.
When choosing a site title, consider aligning it with your business name, product, or a term that resonates within your niche. Consistency is key; keeping the site title unchanged can reinforce brand recognition.
Importance of Your WordPress Site Title
It’s easy to underestimate the significance of the site title. After all, many brands opt to replace it with a logo. However, the benefits of a well-thought-out site title are numerous:
- Brand Recognition: Your site title is often the first thing potential customers notice in search results. It helps them identify your brand and what your site offers.
- Guidance for Visitors: A relevant site title directs visitors to your content, reassuring them they are in the right place.
- SEO Impact: Search engines display your site title prominently, influencing how users perceive your site and affecting your rankings based on relevance and appeal.
How to Change Your WordPress Site Title
Whether you’re launching a new site or updating an existing one, altering your WordPress site title is a straightforward process. Here are two effective methods:
Method 1: Using the WordPress Customizer
The WordPress Customizer is a user-friendly tool that allows you to modify various aspects of your site. Here’s how to change your site title using this feature:
- Log into your WordPress dashboard and navigate to Customize.
- Select Site Identity from the options available.
- Edit the Site Title field. You’ll see the changes reflected in the visual preview on the right.
- Once satisfied, click Publish to save your changes.
Method 2: Through General Settings
Alternatively, you can change your site title via the General Settings:
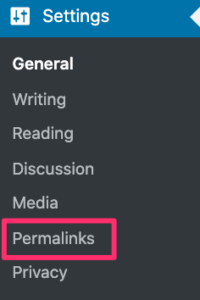
- Go to Settings > General in your WordPress dashboard.
- Locate the Site Title field at the top of the page and make your adjustments.
- Scroll down and click Save Changes to apply your new title.
Next Steps After Changing Your Site Title
Once you’ve updated your title, there are several important checks to ensure everything is set correctly:
- Verify that your site title appears as intended on the front end.
- Ensure the site title field is not left empty, as this can hinder search engine optimization.
- Consider enhancing your branding with a custom logo, which can be uploaded through Appearance > Customize > Site Identity > Logo.
- Check your SEO results in Google to confirm the new title has been updated in search results.
- Ensure your website content aligns with the expectations set by your new title.
- Examine how the title displays when shared on social media and in browser tabs.
- Finally, remind search engines to crawl your site so they can recognize the updated title.
With these steps, you can effectively manage your WordPress site title, ensuring it accurately reflects your brand and meets the needs of your audience. Remember, maintaining a clear and relevant site title is crucial for both user experience and search engine visibility.

